Forming Swages for Anvil Hardy Techniques
Abana Chapter
February 05, 2024
Forging masterpieces in metalwork requires the deft use of hardy tools, an integral part of any blacksmith’s repertoire. Understanding how to form swages for anvil hardy techniques is a foundational skill that enhances precision in shaping metal to your exact specifications. In this journey into the art of swage forming, discover the finesse of creating specialized tools that sit securely in the anvil's hardened hole, executing tasks ranging from meticulous cutting with a hardy chisel to bending and stretching metal with perfect symmetry—skills paramount to elevating your metalworking craft.
Key Takeaways
Swage forming for anvil hardy techniques is essential for high precision metal shaping.
Specialized swage tools fit securely in the anvil's hardy hole to perform tasks such as cutting and bending metal.
A foundational understanding of swage blocks and their applications elevates blacksmithing craftsmanship.
Following a step-by-step guide helps in forging swages correctly and efficiently.
Regular maintenance of swage forming equipment ensures lasting integrity and performance.
Avoiding common mistakes in swage forming techniques can lead to better quality work and tool longevity.
Understanding Anvil Hardy Swage Blocks
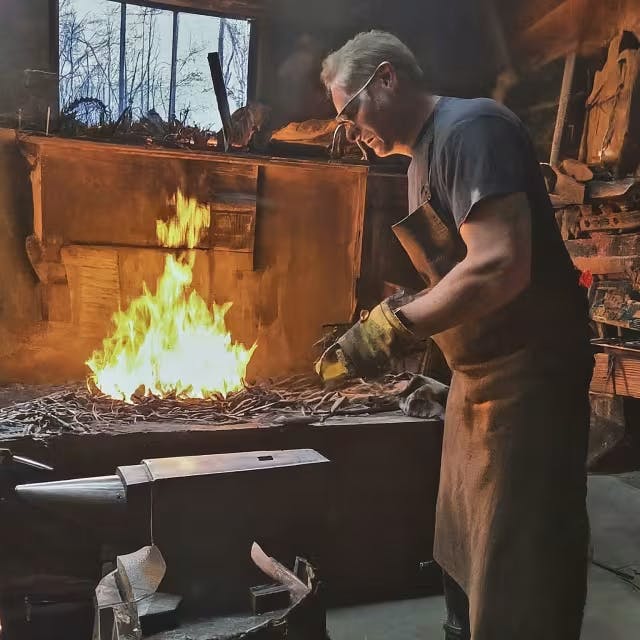
In blacksmithing, the anvil hardy hole is a square socket designed for various tools, one of which is the swage block. Swages serve as molds for shaping metal into desired forms. Because the anvil hardy is a fixture of most blacksmith workstations, it offers a convenient location to secure these swages.
Forming swages for anvil hardy techniques involves creating shapes that mirror the contours of the intended metal workpiece. These swages can be crafted from different materials, with steel being a common choice due to its durability and resistance to wear.
Here's a basic table outlining the steps in the process of making a swage for anvil hardy use:
Step | Description |
1 | Design the swage based on the required shape and size for the metal piece. |
2 | Cut a steel billet to the rough dimensions of the swage. |
3 | Heat the billet in a forge to a workable red or yellow temperature. |
4 | Use a hammer and anvil to shape the hot steel into the mold of the swage. |
5 | Finish shaping on the anvil, refining the swage to fit exactly in the hardy hole. |
6 | Normalize the swage by heating and cooling to relieve internal stresses. |
7 | Hardface the working surfaces if needed for extra durability. |
An understanding of metal's behavior at different temperatures is essential during this process, as well as knowledge of blacksmithing tools and techniques. Once the swage is completed, it can be inserted into the anvil hardy hole, where it is readily accessible for shaping metal pieces on the anvil simply and efficiently.
Using swages expands the capabilities of the anvil by allowing blacksmiths to produce complex shapes that would otherwise be difficult to forge. This not only enhances productivity but also gives rise to higher precision in metalworking projects. The versatility of the anvil hardy and the swages created for it solidify their place as a fundamental component in traditional and modern forging workflows.
For those looking to dive deeper into the process, resources are available that guide on how to craft swage tools for an anvil hardy with detailed instructions and material recommendations.
The Basics of Forming Swage Tools
Swaging is a forging technique that allows blacksmiths and metalworkers to manipulate the dimensions of an item by utilizing a set of dies, which come into play particularly for anvil hardy tools. The process, deeply rooted in historical practices, was traditionally carried out with hand tools, but has since evolved with the advent of machinery capable of performing swaging operations. Swage tools, derived from the Old French word "souage," come in different types, such as swage blocks and fullers, which serve specific shaping functions.
During swaging, material is formed to a desired shape without the loss of material, an advantage in many industries, including assemblage in print circuit boards, furniture crafting, and sawmill operations. Machines now do the heavy lifting with dies that open and close rapidly to repeatedly shape metal into the desired form. Rotary swaging and butt swaging machines cater to different shaping needs, with each type designed for a specific set of tasks and outcomes. Here’s a quick breakdown:
Swaging Type | Description |
Tube Swaging | Used for altering tube dimensions without material loss. |
Roller Swaging | Employs rolling dies to shape the metal. |
Rotary Swaging | For precise, high-speed shaping, particularly for small parts. |
Butt Swaging | Typically involves increasing the diameter of rods or tubes. |
By understanding the various methods and machinery, such as swaging machines detailed on Wikipedia, one can embark on creating intricate and consistently shaped metal pieces, an essential skill in metalwork and smithing.
Step-by-Step Guide to Forging Swages
Creating your own swages for anvil hardy tools is a rewarding process that allows for greater versatility in blacksmithing projects. Here's how to do it with precision and safety:
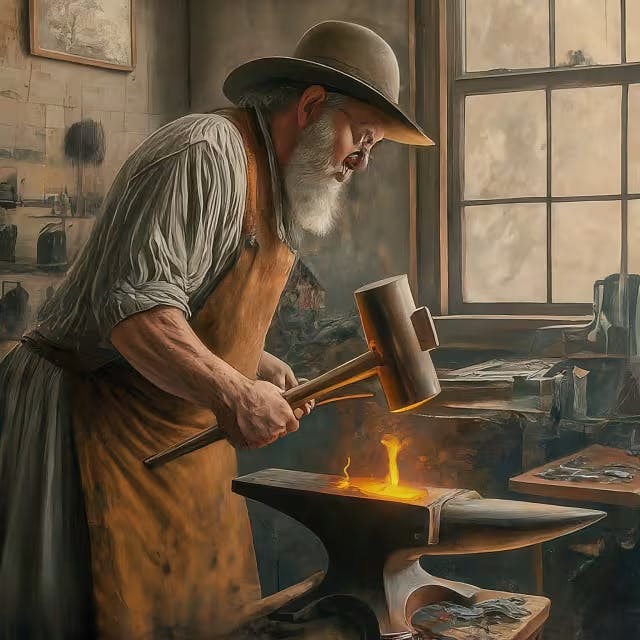
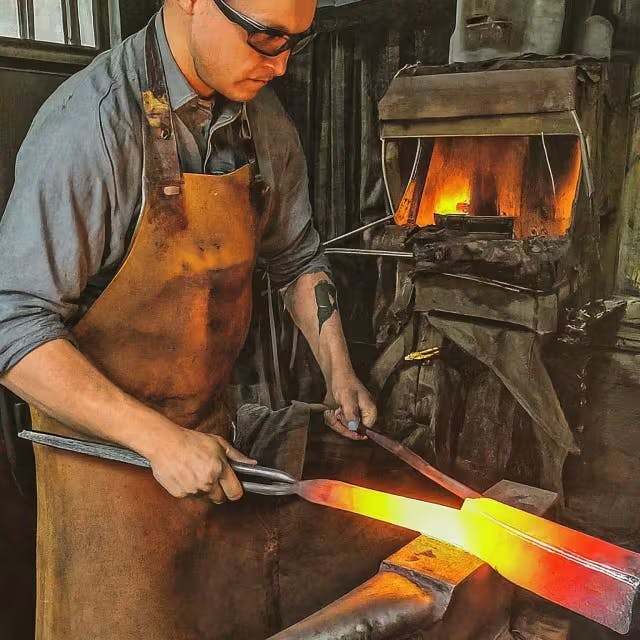
Start by choosing the right material for your swage. High carbon steel is often recommended for its durability and ability to withstand repeated hammering. Next, cut the steel to size; an ample length affords better control during forging. Heat the steel to a bright, cherry-red color—this indicates it's ready to be shaped. Using a power hammer or hand hammer, begin to form the basic outline of the swage, focusing on symmetrical curves or angles as needed for your specific application.
Safety is paramount, so ensure you're wearing appropriate protective gear and working in a well-ventilated environment. Reheat the material as necessary to maintain malleability, and verify dimensions regularly with calipers or a ruler to achieve high precision. As the shape comes closer to the desired form, switch to finer tools like a hand file or a grinder for detailed shaping and smoothing any rough edges.
Once the swage is nearly completed, check for proper fit within the anvil hardy hole. It should sit snugly without excessive play. The final step is hardening the steel by heating it again and then rapidly cooling it in oil or water. This process increases its strength and longevity. Finally, temper the swage by reheating to a lower temperature and allowing it to cool slowly. This will reduce brittleness and improve its overall performance.
By following these steps and utilizing the appropriate techniques, you'll be able to create a custom swage that enhances your anvil hardy toolkit. For a more comprehensive look at the process, consider exploring additional resources like tutorial videos or community workshops to refine your skills.
Maintaining the Integrity of Your Swage Forming Equipment
Properly caring for swage forming tools is essential to ensure the enduring performance of the anvil hardy techniques. Regular inspections are crucial to spot any signs of wear or damage that could affect their function or workshop safety. For instance, users should verify the tightness and intactness of thread connections if applicable.
To extend tool life and maintain precision, periodic cleaning is required to remove any metal filings or debris. Lightly coating with oil can prevent rust and corrosion, especially in humid environments. Additionally, storing equipment in a dry, orderly fashion can safeguard against undue wear.
When using these tools, applying the correct amount of force is key; excessive force may deform swages over time. Ensuring that the anvil hardy hole does not have any obstructions before fitting the swage will also prevent unnecessary damage. Any tool that has become misshapen or cracked should be repaired or replaced immediately to maintain quality craftsmanship.
Here's a quick checklist to help maintain swage forming equipment:
Inspect regularly for wear and damage.
Clean after each use to remove debris.
Lightly oil to ward off rust.
Store properly in a dry place.
Use correct force to prevent deformation.
Keep anvil hardy hole clear for proper fitting.
Repair or replace any damaged tools promptly.
By following these steps, artisans can keep their swage forming tools in optimal condition, which in turn helps to produce consistently high-quality work. For those seeking information or products related to forming swages for anvil hardy techniques, Centaur Forge offers a comprehensive range of blacksmithing tools and resources.
Common Mistakes to Avoid in Swage Forming Techniques
When approaching the task of forming swages for anvil hardy techniques, precision is key. Avoiding a few common errors can result in a better final product and a more efficient forging process. Here's a concise overview of pitfalls to steer clear of:
Ignoring Material Choice: Selecting the right type of metal is crucial. High carbon steel is typically the go-to for its durability and ability to be hardened after shaping.
Inadequate Preheating: It's essential to properly preheat your stock. This ensures the material is malleable enough to shape without cracking.
Overworking the Metal: Hammering the metal too much can weaken it. Find the balance between shaping and overworking.
Forgoing Reheating: Metals cool quickly when worked on an anvil. Regular reheating is necessary to maintain workability.
Imprecise Measurements: Tools created without precise measurements can lead to poor fit in the hardy hole or suboptimal use.
Improper Tooling: Use the correct hammers and tongs for shaping. The right tools provide better control and results.
Here's a quick reference table outlining these key points:
Mistake | Impact | Prevention |
Incorrect Material Selection | Weak or brittle swage | Use high carbon steel |
Skimping on Preheating | Cracking, hard shaping | Properly preheat materials |
Excessive Hammering | Metal fatigue | Moderate your hammer strikes |
Neglecting Reheating | Lost malleability | Reheat metal as it cools |
Lax Measurements | Poor fit or function | Measure twice, cut once |
Wrong Tools | Less control, subpar shape | Match tools to task |
By incorporating these points into practice, blacksmiths can achieve superior swages for their anvil hardy, improving their forging capabilities and the quality of their work. For detailed insights into the properties of high carbon steel and its suitability for swages, check out this resourceful article on metallurgy: Understanding High Carbon Steel. In summary, mastering forming swages for anvil hardy techniques is essential for any blacksmith looking to enhance their metalworking capabilities. With the right tools, materials, and knowledge, you can create durable and precise swages that maintain their integrity over time. Keep in mind the importance of regular maintenance and being vigilant against common mistakes to ensure your swages contribute to the quality and efficiency of your forging projects.
Frequently Asked Questions
What are the essential steps in forming swages for anvil hardy techniques
In blacksmithing, the anvil hardy hole is a square socket designed for various tools, and swages serve as molds for shaping metal into desired forms. Forming swages for anvil hardy techniques typically involves the following steps:
Design the swage to mirror the metal piece's shape.
Cut and prepare a steel billet to approximate dimensions.
Heat the billet to red or yellow and shape it using hammers and an anvil.
Refine the shape to fit snugly in the anvil's hardy hole.
Normalize the swage to relieve stresses and optionally hardface working surfaces.
With knowledge of metal behavior at different temperatures and proficiency in blacksmithing tools and techniques, swages can be made to enhance the versatility of the anvil hardy for efficient and precise metal shaping.
How is high carbon steel a suitable material for crafting swage tools
High carbon steel is a suitable material for crafting swage tools for several reasons:
Durability and resistance to wear: High carbon steel is known for its high hardness and strength after heat treatment. It can endure the repeated striking and shaping processes on the anvil without significant wear, maintaining accuracy in shape over extensive use.
Maintaining sharp contours and edges: The high carbon content allows for the steel to be hardened, which is crucial for the swage tool to maintain its defined shape. Sharp edges and contours are necessary for precise shaping, which high carbon steel can reliably provide.
Resilience under high stress: Crafting swages requires a material that can withstand the stress of hammering and shaping metal. High carbon steel's resilience ensures that the tool doesn't deform under these high-stress conditions, ensuring consistent performance.
Moreover, the ability to be hardened and tempered means that high carbon steel swages can be fine-tuned to optimize their performance for the specific tasks required by the blacksmith. The combination of these properties makes high carbon steel an excellent choice for creating durable and effective swage tools for shaping metal in the anvil hardy hole.
What safety measures should be taken when shaping swages for anvil hardy use
When shaping swages for anvil hardy use, it’s important to prioritize safety and accuracy. Always wear appropriate safety gear, including eye protection, gloves, and aprons, to protect against hot metal and flying debris. Ensure your work environment is well-ventilated to avoid inhaling any harmful fumes from the forge. Moreover, use high carbon steel for making swages, as it can withstand repeated use and be hardened for durability. Preheat the steel sufficiently before shaping to ensure it is malleable, and avoid overworking or overheating the metal to prevent weakening or warping it. Also, reheating may be necessary during the process to keep the metal workable. Accurately measure and regularly check the fit of the swage in the hardy hole to avoid poor outcomes. Use the correct tools, such as the right hammers and tongs, to shape the swage effectively without excessive force, which might cause deformation.
Finally, after use, inspect swage forming tools for wear, clean them to remove debris, lightly oil to prevent rust, and store properly. Repair or replace any damaged tools to maintain safety and quality in your blacksmithing projects.
How can you maintain and extend the lifespan of swage forming tools
To maintain and extend the lifespan of swage forming tools used in anvil hardy techniques, follow these guidelines:
Conduct regular inspections for wear, damage, and ensure threaded connections are tight if present.
Clean the tools after each use to remove metal filings or debris, and lightly oil them to prevent rust and corrosion.
Store the tools in a dry environment to avoid unnecessary wear.
Apply the correct amount of force when using the tools to prevent deformation.
Ensure the anvil hardy hole is clear before fitting the swage to avoid damage.
Repair or replace tools that become damaged or misshapen to maintain precision in your work.
By adhering to these practices, the functionality and integrity of your swage forming tools will be preserved, thus enhancing the quality of your metalwork.
What are common mistakes to avoid when forming swages for anvil hardy techniques
Avoid these common mistakes when forming swages for anvil hardy techniques to ensure efficient and high-quality results:
Incorrect Material: Select high carbon steel for its durability and hardening capability.
Inadequate Preheating: Always preheat the steel billet properly to increase malleability and prevent cracking.
Overworking the Metal: Shape the metal with care, as excessive hammering can result in weak spots.
Skipping Reheating: Reheat the metal during the shaping process to keep it workable.
Imprecise Measurements: Use accurate measurements to ensure a proper fit inside the hardy hole.
Improper Tooling: Utilize the correct tools for shaping to maintain control and achieve desired results.
Integrate these considerations into your workflow to craft reliable and precise swages for your anvil hardy projects.

